NAS
I don't like cloud providers very much for hosting my data, for privacy reasons.
I do have koofr and use it's WebDAV interface in combination with rclone to encrypt everything. That works well. I still hesitate to upload some private data there.
But for my local data, I used to only have a single hard disk, which I backed up manually from time to time (like once every two years..).
I had been thinking about setting up a private NAS (Network Attached Storage) for some time, but never did it.
Until now. Here is what I did to set it up.
1. My requirements
1.1. Buy a Ready-to-use NAS?
There are some companies which provide easy-to-use solutions like Synology, Western Digital or Terramaster.
I'm not sure about all of them, but most provide their own software which you have to use with their systems. I didn't want to be dependent on their software but rather use a plain Linux system to maybe be more flexible in the future.
1.2. HDD vs SSD
To keep a small form factor and low power consumption, I though about HDD vs. SSD. Since there are no large 2.5 inch HDDs, the choice was between
- 3.5 inch HDD
- 2.5 inch SSD
- m.2 SSD
There are pros and cons for each, mainly regarding the disk capacity, but I ended up with a m.2 system. I happened to find a nice mini PC which met exactly my criteria.
1.3. TrueNas, OpenMediaVault?
Then there was the question to either use a software like TrueNAS or OpenMediaVault, or instead use a plain Linux with some manually installed server software.
I'm still not 100% sure about this one, but I've started with plain Linux because I don't need things like a web view / browser access to my files.
I am happy with some direct file access protocol which can be nicely integrated into my file browser.
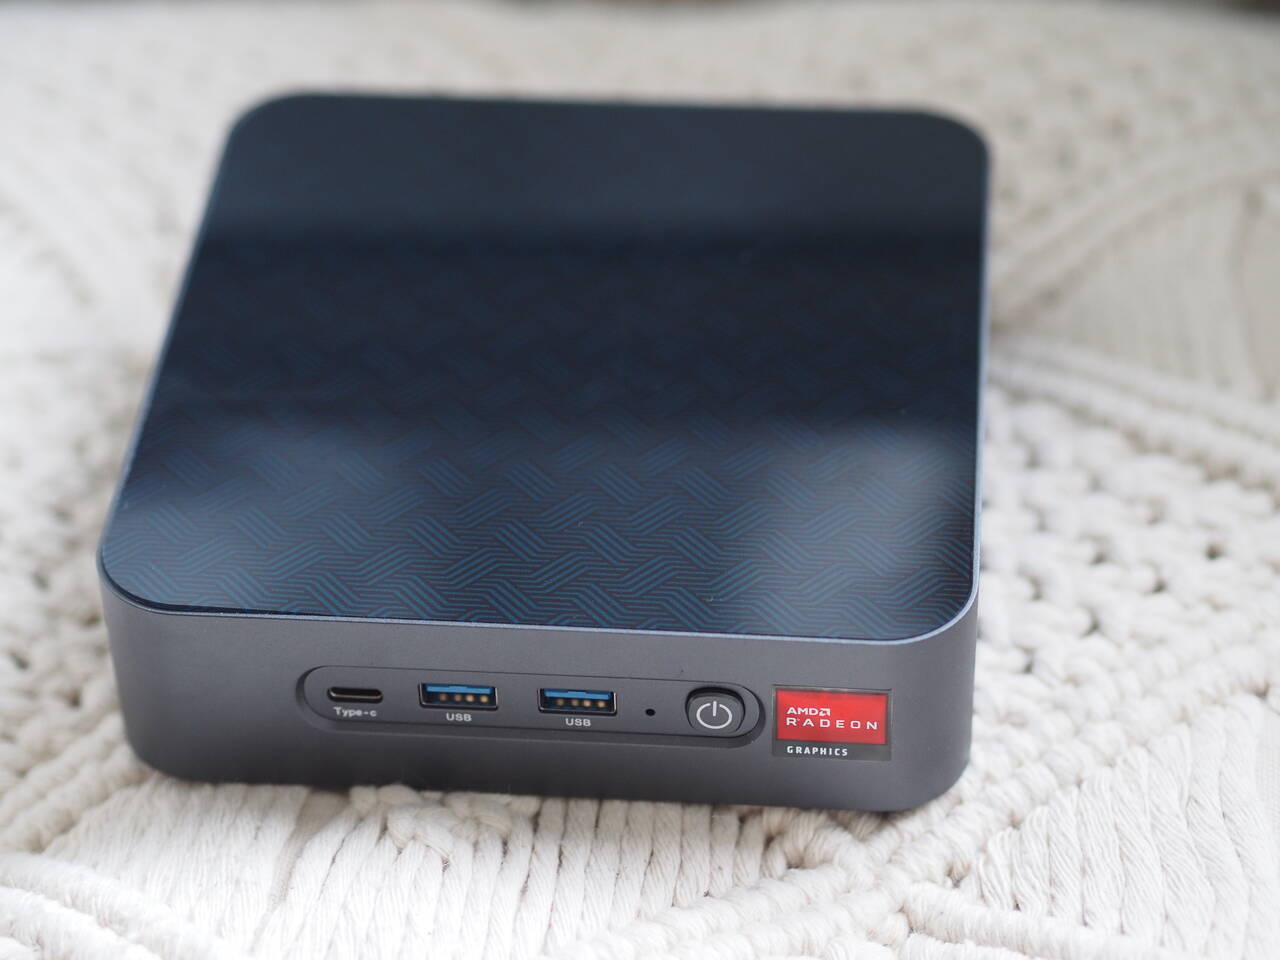
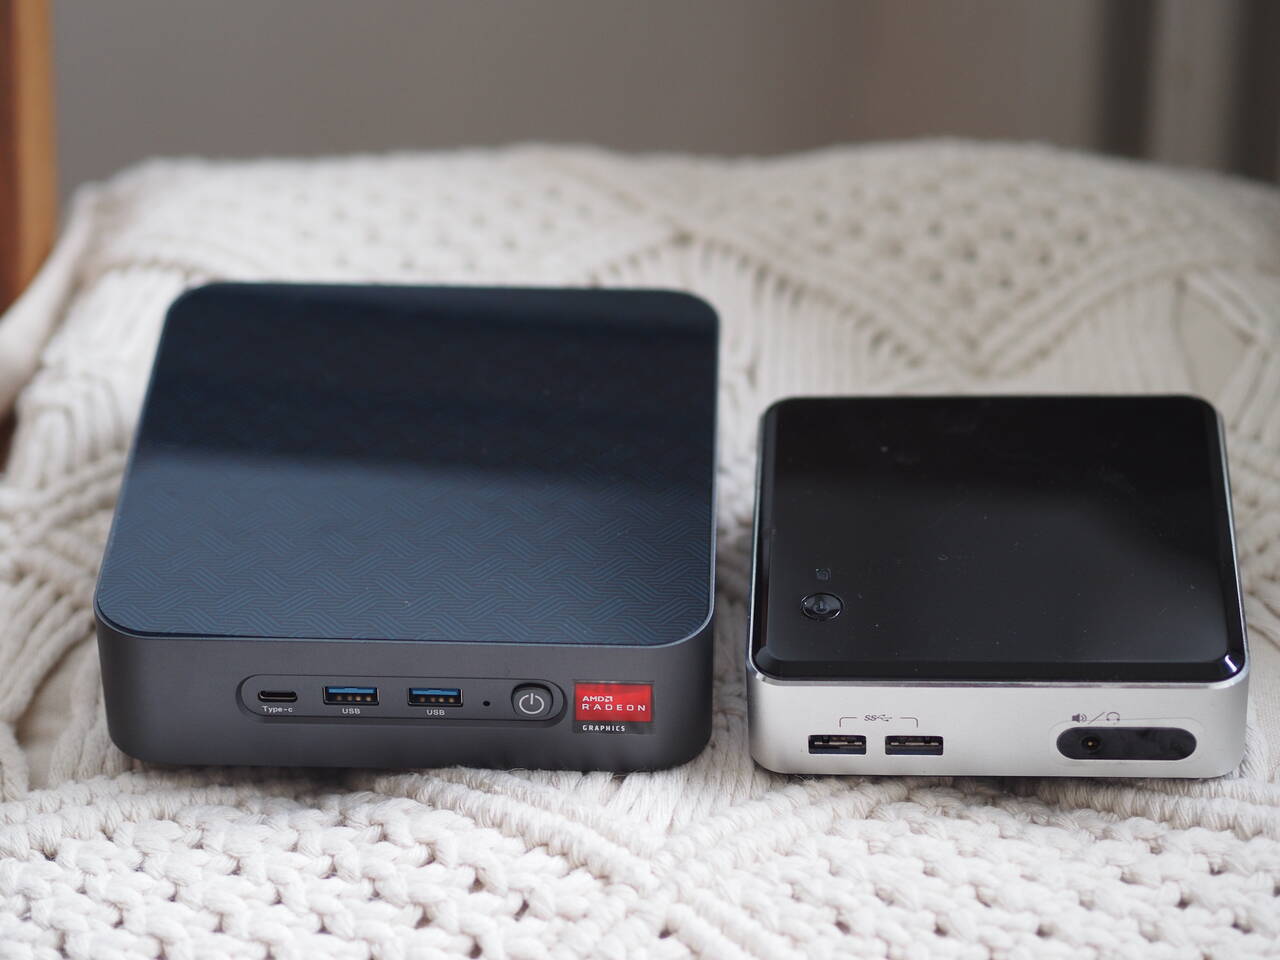
2. The hardware
I found a Morefine S500+ Mini PC with a AMD 5300U processor on AliExpress for about 220 EUR. There are not too many mini PCs which offer two full 2280 m.2 slots, but this one does. Additionally, it takes a 2.5 inch SSD, which I will use for the operating system.
There were more powerful CPU options, but I've decided to take the lowest performance one
to keep power consumption low, and it will be overdimensioned anyway for a simple task like a file server.
So I put in 64 GB DDR4 SODIMM RAM, a 512 GB 2.5 inch SSD for the operating system and two 4 TB m.2 2280 SSDs for my data.
The second SSD needs to be installed from the bottom, where the screws were hidden under the rubber feet.

3. The software
3.1. Linux
I use Debian as distribution.
I set up sudo, ssh, lm-sensors, parted, ncdu, rsync.. nothing special.
I also made sure the server time is synchronized via NTP.
3.2. RAID setup with mdadm
Since I used to only have a single HDD for my data, there was always the risk of a disk failure to lose all my data. To avoid that risk in future, I set up the two disks as a RAID 1, which mirrors the data to both drives. So if one drive fails for whatever reason, I still have a working disk remaining.
I never set up a RAID in Linux so far.
There were BIOS options to set up a hardware RAID, but the internet says a software
raid with mdadm on Linux is reliable and pretty common.
3.2.1. Partition disks
I use two SSDs from different manufacturers and they have a slight difference in size, so I partitoned the disks to have partitions of exactly the same size.
sudo fdisk /dev/nvme1n1:
gfor a GPT partition table (required for 4 TB)nfor new partition- accept default start sector (
2048) - For last sector / end, enter
+3700G, which will end up in 7759462400 sectors size wfor write to disk
3.2.2. Check alignment
Make sure the size aligns with the sector size of the disks, which is typically 512 bytes, but can be 4 KB in some cases.
sudo parted /dev/nvme1n1
align-check opt 1
3.2.3. mdadm setup
sudo mdadm --create --verbose /dev/md0 --level=1 --raid-devices=2 /dev/nvme0n1p1 /dev/nvme1n1p1
sudo mkfs.ext4 -m 1 -L storage /dev/md0
cat /proc/mdstat-m: reserved blocks percentage
nas@nas ~> cat /proc/mdstat
Personalities : [raid1] [linear] [multipath] [raid0] [raid6] [raid5] [raid4] [raid10]
md0 : active raid1 nvme1n1p1[1] nvme0n1p1[0]
      3879599104 blocks super 1.2 [2/2] [UU]
      [>....................]  resync =  0.2% (8377600/3879599104) finish=304.1min speed=212128K/sec
      bitmap: 29/29 pages [116KB], 65536KB chunk

unused devices: <none>
After creating the RAID it immediately starts to sync. This takes some time, but you can still perform write actions like setting up the file system.
There was a choice here again: ext4 vs. ZFS vs. XFS. I only used ext4 so far and decided to use it.
3.2.4. Setup raid after boot
sudo mdadm --detail --scan | sudo tee --append /etc/mdadm/mdadm.conf
sudo update-initramfs -u
ARRAY /dev/md0 metadata=1.2 name=nas:0 UUID=12345678:90abcdef:12345678:90abcdef3.2.5. Mount filesystem after boot
sudo mkdir -p /mnt/nas
sudo blkid /dev/md0
echo 'UUID=12345678-90ab-cdef-1234-567890abcdef /mnt/nas ext4 defaults 0 0' | sudo tee --append /etc/fstab
sudo reboot
3.3. File server protocol: sshfs / sftp
For the file server protocol you can use SMB, WebDAV or: sshfs.
It uses sftp under the hood and therefore is easy to set up. I don't even care about multi-user authentication, but that would be possible, too.
On the server, you don't need to install anything extra beside the SSH server with SFTP enabled.
On the client, you need the sshfs package and can run these commands:
sshfs nas@nas:/mnt/nas /mnt/nas
# To unmount:
fusermount3 -u /mnt/nas
3.3.1. Persist (on demand / manual) mount in fstab
Edit the /etc/fstab file:
sshfs#nas@nas:/mnt/nas /mnt/nas fuse noauto,defaults,user,_netdev,comment=x-gvfs-show 0 0To mount and unmount:
mount /mnt/nas
fusermount3 -u /mnt/nas
3.3.2. Thunar connection
I use Thunar as file browser and wanted to use the drive in it. The drive shows up in Thunar, but there is one problem: Mounting it results in 'Connection reset by peer', which indicates a missing/wrong SSH key? TPM input box doesn't show up.
This might be https://gitlab.gnome.org/GNOME/gnome-session/-/issues/66 or https://gitlab.gnome.org/GNOME/gvfs/-/issues/719
The reason was: The gpg agent was set up for the fish shell, but not for systemd. XFCE still started the normal SSH agent and this one was used by Thunar.
Links:
- https://gitlab.gnome.org/GNOME/gnome-session/-/issues/66
- https://gitlab.gnome.org/GNOME/gvfs/-/issues/719
- https://debianforum.de/forum/viewtopic.php?t=168258
3.3.3. Automatically set gpg agent for systemd
So I needed some extra configuration to correctly set SSH_AUTH_SOCK for systemd:
https://gist.github.com/ansemjo/b9337e330cd7dd7b6d2dd36c6400fc1b
systemctl --user disable gcr-ssh-agent.socket
systemctl --user disable gcr-ssh-agent.service
sudo systemctl --global disable --now gcr-ssh-agent.socket
Important: Disable the default SSH agent started by XFCE.
It would also try to set the environment variable SSH_AUTH_SOCK.
xfconf-query -c xfce4-session -p /startup/ssh-agent/enabled -n -t bool -s false
echo use-standard-socket >> ~/.gnupg/gpg-agent.conf
Now setup this small service to set the required environment variables:
[Unit]
Description=Set SSH_AUTH_SOCK to GnuPG agent

[Service]
Type=oneshot

# disable gnome-keyring-ssh
# ExecStartPre=/bin/bash -c 'cat /etc/xdg/autostart/gnome-keyring-ssh.desktop \
#  <(echo "Hidden=true") > %h/.config/autostart/gnome-keyring-ssh.desktop'

# set environment
ExecStart=/usr/bin/bash -c 'systemctl --user set-environment \
  SSH_AUTH_SOCK=$(gpgconf --list-dirs agent-ssh-socket) \
  GSM_SKIP_SSH_AGENT_WORKAROUND="true"'

# See the below link for why we need GSM_SKIP_SSH_AGENT_WORKAROUND:
# https://git.gnome.org/browse/gnome-session/tree/gnome-session/main.c?h=3.24.0#n419

[Install]
WantedBy=default.target
systemctl --user enable --now ssh-auth-sock.service4. Thoughts about encryption
I've decided to not encrypt the partitions, because otherwise unattended restarts can be a problem (they'd require a password or some TPM magic).
Instead, I encrypt important files manually with OpenPGP.
5. Conclusion
I am very happy with my setup now.
Power consumption is alright with ~6 W on idle.
I need to get used to a bit less transfer speed, but I enjoy being able to access my files without plugging any cable and also be safe that a disk failure would still cost money, but wouldn't lose me any data.