Virtual machines: VirtualBox vs. libvirt, QEMU on M1, vagrant
I've used various virtualization technologies in the past and have now switched to libvirt as my main tool and would like to explain why.
1. What I use virtualization for
I use virtual machines..
- ..as an isolated playground for new technologies.
- ..to build programs for different operation systems or architectures (whatsapp-viewer for Windows, moonwatch for Samsung Smartwatch).
- ..to have one machine for a specific set of tasks, for example everything regarding taxes. I can be sure the programs will still work, regardless of how many (possibly incompatible) updates I apply on my main system.
- ..on macOS to run Docker
For me the most important point about them is to have a portable setup. I want to be able to quickly switch to a new system and still be able to continue working with my boxes.
I will skip Docker here, because I use it for different reasons.
2. VirtualBox
For my very first virtual machines I've used Connectix Virtual PC, which was just a 10 MB binary with a limited feature set, but it was super easy to use and did it's job very well for my purposes.
After that I've been using VirtualBox for many years and was quite happy with it.
Sometimes I had some issues to get the right packages installed.
There was virtualbox, virtualbox-host-dkms, virtualbox-guest-iso and virtualbox-ext-oracle, which was quite confusing.
The host-dkms also had to be rebuilt everytime the kernel changed, which took some time.
Also, the licensing model wasn't completely free.
However, overall it was an easy method to get everything set up.
3. Apple Silicon (M1/M2), alternatives?
Until..Apple Silicon came around, and VirtualBox doesn't and will not support running x86 boxes on it. I am aware the performance of an emulated x86 system will be aweful. However, sometimes I just have a good feeling I could run a full build of my favorite software, despite poor performance, instead of not being able to build it at all.
That's why I started to look for a way to run Windows on Apple Silicon. There is UTM, which is like a QEMU GUI frontend for macOS only (huh?). But since we use libvirt and virt-manager at work, I thought it would be worth a shot. It would also be a os-independent solution, which I hope could last very long.
4. QEMU
But first, let's take a short step back. I tested libvirt with the QEMU hypervisor driver. So what is QEMU?
QEMU is an emulator which allows you to run x86 code on an ARM machine and vice versa. It also supports a large list of additional platforms and offers hardware-assisted virtualization (KVM or HVF).
When I developed a small game for the PlayStation Portable back in the day it was the first time I used cross compiling. The PSP has a MIPS32 R4000 processor and in order to compile your code for it your either had to compile it on the PSP itself, or use a compiler which supports cross-compilation. I found some tutorials on how to write C code and compile it to MIPS on a x86 machine. There was a whole community around it that reversed all the graphical APIs and I could write simple OpenGL calls to use them via their SDK. Great times.
Later, I used it to build programs for the Raspberry Pi and Arduino.
4.1. Cross-compiling example (ARM)
Here is a small example how to cross-compile a simple assembler Hello World for ARM architecture.
First, install a toolchain for
- an assembler
- a linker
- gcc
- and some other tools like objdump
You can either use the precompiled arm-none-linux-gnueabihf-toolchain-bin (you can find a more recent version
here)
or compile it yourself by using arm-linux-gnueabihf-gcc (it will take some time, though, >1h on my machine).
yay -S arm-linux-gnueabihf-gccThis costs some time and needed manual adjustments. Check the AUR page for instructions.
4.1.1. Assembly example
Let's take this ARM 32-bit Hello World program:
.section .text
.global _start

_start:
/* syscall write(int fd, const void *buf, size_t count) */
    mov r0, #1
    ldr r1, =msg
    ldr r2, =len
    mov r7, #4
    svc #0

/* syscall exit(int status) */
    mov r0, #0
    mov r7, #1
    svc #0

msg:
.ascii "Hello, ARM32!\n"
len = . - msg
Compile and link the program as follows
$ arm-linux-gnueabihf-as -o example-as.out example.as
$ arm-linux-gnueabihf-ld -o example-as example-as.out
$ file ./example-as
./example-as: ELF 32-bit LSB executable, ARM, EABI5 version 1 (SYSV), statically linked, not stripped
4.1.2. C example (gcc)
#include <stdio.h>

int main() {
  printf("ARM C Test\n");
  return 99;
}
arm-linux-gnueabihf-gcc -static -o example-c example.cNote: If you don't statically link the file, you might see this error:
qemu-arm: Could not open '/lib/ld-linux-armhf.so.3': No such file or directory
4.1.3. Run ARM binary on x86_64 system
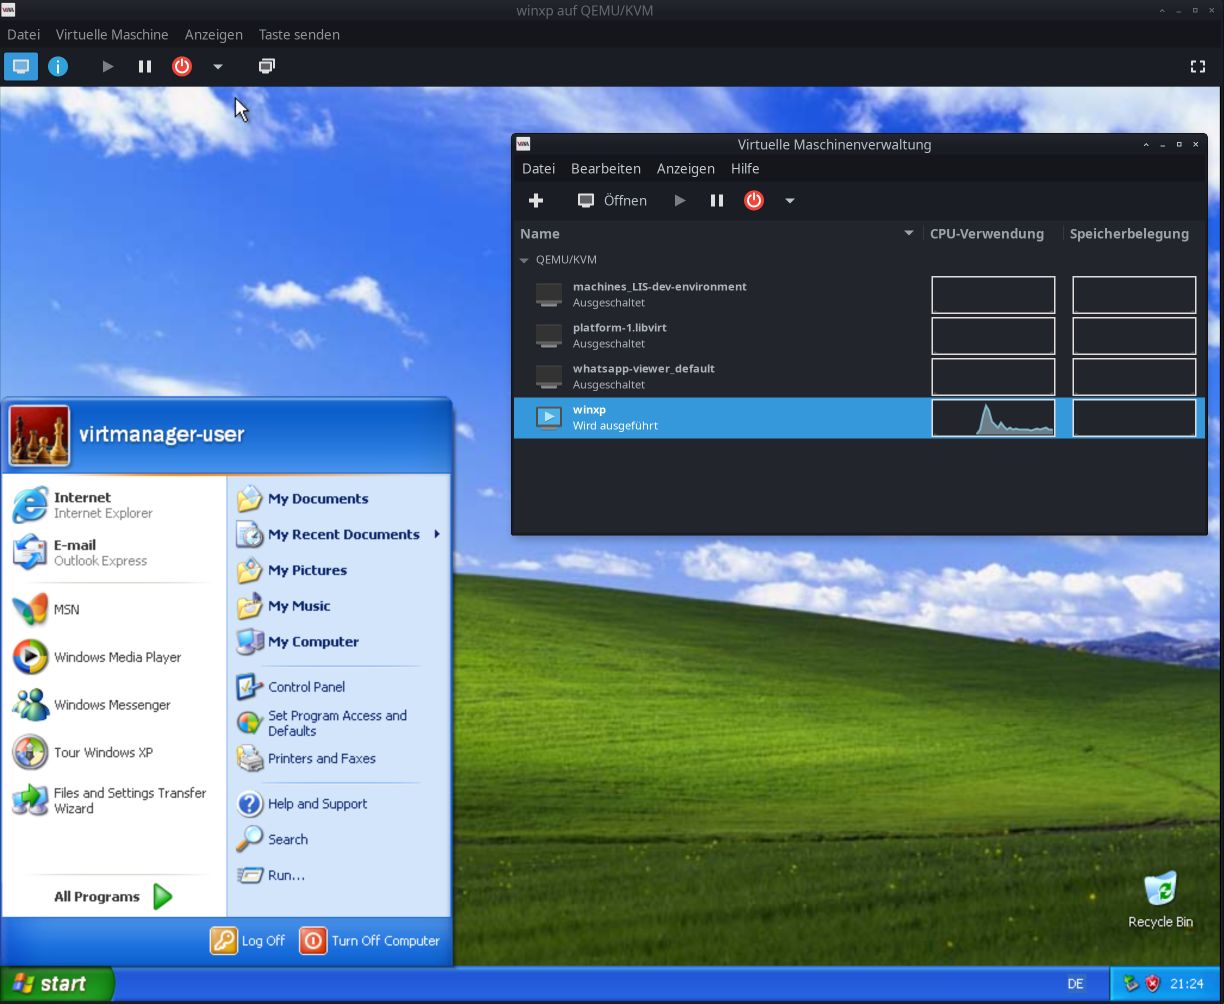
Now QEMU can run the ARM binary code on a x86_64 CPU. You can run a single binary by using User Mode emulation or run a full-blown system via the System emulation. With the latter, you can run Windows XP on an ARM CPU, for example. We will use the User Mode emulation in our example, though.
$ sudo pacman -S qemu-user
$ ./example-as
exec: Failed to execute process: './example-as' the file could not be run by the operating system.
$ qemu-arm ./example-as
Hello, ARM32!
$ qemu-arm ./example-c
ARM C Test
$ echo $status
994.1.4. Virtualization vs. Emulation
A short note on this: I'm sure most of you are aware of the differences (especially performance-wise). My goal is to have a virtual machine running, by either emulation or virtualization. Since both can be used to accomplish this, this article deals with both terms.
4.2. Check support for KVM
To check support for hardware-assisted virtualization via KVM, run these commands:
LC_ALL=C lscpu | grep Virtualization
zgrep CONFIG_KVM /proc/config.gz
5. libvirt and virt-manager
Back to virtualization and trying the alternative for VirtualBox: libvirt.
Starting off with libvirt was..not super easy. There are a lot of different tools and libraries and it feels like a bunch of everything at the beginning.
libvirt, virsh, virt-install, virt-manager, libvirt-nss, qemu-system-x86_64, qemu-img, cloud-init.. uff.
Let me try to break this down a bit:
- QEMU: as mentioned above, a machine emulator and virtualizer. Used by libvirt behind the scenes
(libvirt can also use other providers than QEMU, but we will use it in this article).
- qemu-arm: The user mode emulation for ARM
- qemu-system-x86_64: The whole system emulation for x86_64
- qemu-img: a CLI tool to create hard-disk images
- libvirt: a toolkit to manage virtualization platforms
- virsh: a CLI tool to manage libvirt's machines
- virt-install: a CLI tool to create a new libvirt machine
- virt-manager: a GUI tool to view, start and stop libvirt's machines
- libvirt-nss: an extension module to access a libvirt machine by it's hostname
- cloud-init: A tool to set up a brand new machine. It will set up networking, SSH keys, create users and so on.
I have used these versions for the commands in this post:
- GCC: 12
- arm gnueabihf binutils: 2.38
- QEMU: 7.1.0
- libvirt: 8.9.0
- virt-manager / virt-install: 4.1.0
5.1. Why not just pure QEMU?
QEMU works great on it's own. Here is a small example how to set up a Windows XP box.
qemu-img create -f qcow2 windows.qcow2 30G

# Boot from iso and run Windows Setup
qemu-system-x86_64 -m 2G [-machine type=q35] -smp 2 -vga virtio -usb -device usb-tablet -display default,show-cursor=on -hda windows.qcow2 -cdrom ~/Downloads/en_windows_xp_professional_with_service_pack_3_x86_cd_vl_x14-73974.iso

# After the installation is done, run from hard disk
qemu-system-x86_64 -m 2G -smp 2 -vga virtio -usb -device usb-tablet -display default,show-cursor=on -hda windows.qcow2
QEMU by default only works with a BIOS.
If you wish to run a box with UEFI boot, you need to specify a different firmware file:
-bios /usr/share/edk2-ovmf/x64/OVMF.fd
Other interesting CLI options are:
-machine type=q35-cpu qemu64-v1-accel kvm
The limitations of using QEMU directly is that it doesn' store the configuration for a box. You would have to remember all CLI options for each machine, and also which hard-disk image to use.
5.2. Install libvirt, virt-manager
libvirt addtionally helps you to save the settings of the box, set up the network,
and it supports different providers than just QEMU.
It stores the configuration for each box in a XML file.
sudo pacman -S cloud-image-utils virt-install virt-manager qemu qemu-ui-gtk
sudo systemctl status libvirtd.service
sudo systemctl enable libvirtd.service
sudo systemctl start libvirtd.service

sudo nano /etc/libvirt/libvirtd.conf
# Edit the file and set the two lines below (uncomment them):
# unix_sock_group = "libvirt"
# unix_sock_rw_perms = "0770"
sudo usermod -a -G libvirt $(whoami)
newgrp libvirt
sudo systemctl restart libvirtd.service
5.3. Permissions
I got some Access denied errors when trying to run a virtual box where the image file was in my home directory.
The problem was that the user libvirt-qemu needs to have access to that image.
There are several ways to solve this. You could..
- ..move the file into a directory which is accessible by you and libvirt-qemu.
- ..switch the user qemu uses inside
/etc/libvirt/qemu.conf. - ..grant libvirt-qemu access to that file:
sudo setfacl -m u:libvirt-qemu:rx /home/user/image.qcow2
5.4. Machine hostname resolving (DNS)
To access boxes by their hostname, you can either set up a DNS service, or use a
module which comes with libvirt: libvirt-nss.
5.4.1. DNS service via systemd
Change the systemd resolver config as follows:
[Resolve]
DNS=192.168.122.1
Domains=~libvirt
The IP address in the DNS field needs to match your libvirt network configuration (see below). Also, you box must have set the correct domain.
After editing the file you need to restart the resolver
sudo systemctl restart systemd-resolved.serviceThen, you can access your machine by it's hostname, for example my-box.libvirt.
5.4.2. libvirt-nss
I prefer this libvirt-nss method, though.
It's already included in the Arch package, so all I had to do to use it was to modify my config file:
// ...
hosts: files libvirt libvirt_guest dns
// ...
See this page for full instructions.
Note: The module only works for the hostname, not for the FQDN hostname.domain.
I solved it for myself by naming the machine hostname.domain.
Then, I can access the machine by both names, hostname and hostname.domain.
5.5. qemu:///system vs qemu:///session
Regarding virsh: Some things, like setting up a network, can only be done with QEMU in system mode. See this post
So after seeing a lot of Access denied messages, I've decided to use qemu:///system as my default.
Therefore, you can create this config:
echo uri_default = \"qemu:///system\" >> ~/.config/libvirt/libvirt.confNow running virsh net-list --all is implicitly called like virsh --connect qemu:///system net-list --all,
which makes all commands on the CLI much easier to type.
5.6. Useful virsh CLI commands
Here is a full example how to set up an Ubuntu machine via libvirt and QEMU:
# Show all boxes (the libvirt term is 'domain' for whatever obscuring reason)
virsh list --all

# Show all networks
virsh net-list --all
# Create a new network
virsh net-define virsh-my-network.xml
virsh net-dumpxml default
virsh net-start my-network
# Show all clients in a network
virsh net-dhcp-leases my-network

# Create a hard disk based on Ubuntu
sudo wget --directory-prefix=/var/lib/libvirt/images/ https://cloud-images.ubuntu.com/kinetic/current/kinetic-server-cloudimg-amd64.img
sudo qemu-img create -b /var/lib/libvirt/images/kinetic-server-cloudimg-amd64.img -f qcow2 -F qcow2 /var/lib/libvirt/images/my-disk.qcow2 125G
qemu-img info /var/lib/libvirt/images/my-disk.qcow2
sudo chown libvirt-qemu:libvirt-qemu /var/lib/libvirt/images/my-disk.qcow2

# Create a cloud-init .iso file
sudo cloud-localds /var/lib/libvirt/images/box.cloudinit.iso box.user-data box.meta-data
sudo chown libvirt-qemu:libvirt-qemu /var/lib/libvirt/images/box.cloudinit.iso

# Create and boot a new box
virt-install --name my-box.libvirt --memory 4096 --disk /var/lib/libvirt/images/my-disk.qcow2,device=disk,bus=virtio --disk /var/lib/libvirt/images/box.cloudinit.iso,device=cdrom --osinfo ubuntu22.10 --virt-type kvm --graphics none --network network=my-network --import --noautoconsole

# Show configuration
virsh dumpxml my-box.libvirt

# After the boot you can connect to the box
ssh user@my-box.libvirt

# Start and stop the box
virsh start my-box.libvirt
virsh shutdown my-box.libvirt
Files
Example network file:
<network connections='1'>
  <name>my-network</name>
  <uuid>e60f1806-bf2b-4991-be55-03d51ee38b50</uuid>
  <forward mode='nat'>
    <nat>
      <port start='1024' end='65535'/>
    </nat>
  </forward>
  <bridge name='virbr1' stp='on' delay='0'/>
  <mac address='52:54:00:7d:15:a7'/>
  <domain name='libvirt' localOnly='yes'/>
  <ip address='192.168.122.1' netmask='255.255.255.0'>
    <dhcp>
      <range start='192.168.122.2' end='192.168.122.254'/>
    </dhcp>
  </ip>
</network>
Example cloud-init files:
instance-id: my-box
local-hostname: my-box
#cloud-config
hostname: my-box
local-hostname: my-box
fqdn: my-box.libvirt
users:
- name: user
primary_group: users
sudo: ALL=(ALL) NOPASSWD:ALL
shell: /bin/zsh
ssh_authorized_keys:
- ssh-rsa AAAAB...p0= hostuser@host
chpasswd:
expire: false
write_files:
- content: |
net.ipv6.conf.all.disable_ipv6 = 1
net.ipv6.conf.default.disable_ipv6 = 1
owner: root:root
path: /etc/sysctl.d/00-ipv6.conf
permissions: '0644'
packages:
- zsh
package_update: true
package_upgrade: true
package_reboot_if_required: true6. vagrant
Now everything is set up, the box runs, we are done, right? Well, yes.
But personally I like to use Vagrant on top of my virtualization provider.
It allows to commit the configuration to your repo.
And people can just call vagrant up to do the whole setup process,
there is no need to follow a (maybe longer) command list.
Additionally, people can choose their personal favorite provider between libvirt, VirtualBox and more
(as long as the base box is available for the provider).
Make sure to have the Vagrant and its required plugins installed on your machine:
sudo pacman -S vagrant
vagrant plugin install vagrant-hostmanager
vagrant plugin install vagrant-libvirt
vagrant plugin list
Here is a sample Vagrantfile I use:
# -*- mode: ruby -*-
# vi: set ft=ruby :

Vagrant.configure(2) do |config|
  config.vm.box = "generic/ubuntu2210"
  config.vm.box_version = "4.2.4"

  config.hostmanager.enabled = true
  config.hostmanager.manage_host = true
  config.hostmanager.manage_guest = true
  config.hostmanager.ignore_private_ip = false
  config.hostmanager.include_offline = true

  config.vm.define 'my-environment' do |node|
    node.vm.hostname = 'my-vagrant-box'
  end

  config.vm.provision "shell" do |s|
    ssh_pub_key = File.readlines("#{Dir.home}/.ssh/id_rsa.pub").first.strip
    s.inline = <<-SHELL
      echo #{ssh_pub_key} >> /home/vagrant/.ssh/authorized_keys
    SHELL
  end

  config.vm.provider "virtualbox" do |vb|
    vb.memory = 4096
    vb.cpus = 2
  end

  config.vm.provider :libvirt do |v|
    v.memory = 4096
    v.cpus = 2
  end
end
Whether the user wants to use libvirt or VirtualBox, he can just put the file in a directory and call
vagrant upIf necessary, he can explicitly pass the provider he would like to use via the --provider=libvirt flag.
7. vagrant and Windows
WhatsApp Viewer's Vagrantfile used a box which is not available in libvirt's format.
That's why I switched to a different one, which supports both, libvirt and VirtualBox.
7.1. WinRM problem: OpenSSL MD4
However, when trying to set it up I got a cryptic error message:
Shell: Cmd Command: hostname Message: Digest initialization failed: initialization error INFO interface: Machine: error-exit ["VagrantPlugins::CommunicatorWinRM::Errors::ExecutionError", "An error occurred executing a remote WinRM command.\n\nShell: Cmd\nCommand: hostname\nMessage: Digest initialization failed: initialization error"]
I ran vagrant up --debug, which gave me this:
Shell: Cmd
Command: hostname
Message: Digest initialization failed: initialization error
ERROR vagrant: /opt/vagrant/embedded/gems/2.3.3/gems/vagrant-2.3.3/plugins/communicators/winrm/shell.rb:198:in `raise_winrm_exception'
/opt/vagrant/embedded/gems/2.3.3/gems/vagrant-2.3.3/plugins/communicators/winrm/shell.rb:140:in `rescue in execute_with_rescue'
/opt/vagrant/embedded/gems/2.3.3/gems/vagrant-2.3.3/plugins/communicators/winrm/shell.rb:137:in `execute_with_rescue'
/opt/vagrant/embedded/gems/2.3.3/gems/vagrant-2.3.3/plugins/communicators/winrm/shell.rb:71:in `block in cmd'
/opt/vagrant/embedded/gems/2.3.3/gems/winrm-2.3.6/lib/winrm/connection.rb:42:in `shell'
/opt/vagrant/embedded/gems/2.3.3/gems/vagrant-2.3.3/plugins/communicators/winrm/shell.rb:70:in `cmd'
/opt/vagrant/embedded/gems/2.3.3/gems/vagrant-2.3.3/plugins/communicators/winrm/communicator.rb:107:in `block in ready?'
/opt/vagrant/embedded/gems/2.3.3/gems/timeout-0.3.0/lib/timeout.rb:179:in `block in timeout'
/opt/vagrant/embedded/gems/2.3.3/gems/timeout-0.3.0/lib/timeout.rb:36:in `block in catch'
/opt/vagrant/embedded/gems/2.3.3/gems/timeout-0.3.0/lib/timeout.rb:36:in `catch'
/opt/vagrant/embedded/gems/2.3.3/gems/timeout-0.3.0/lib/timeout.rb:36:in `catch'
/opt/vagrant/embedded/gems/2.3.3/gems/timeout-0.3.0/lib/timeout.rb:188:in `timeout'
/opt/vagrant/embedded/gems/2.3.3/gems/vagrant-2.3.3/plugins/communicators/winrm/communicator.rb:106:in `ready?'
/opt/vagrant/embedded/gems/2.3.3/gems/vagrant-2.3.3/plugins/communicators/winrm/communicator.rb:57:in `block in wait_for_ready'
/opt/vagrant/embedded/gems/2.3.3/gems/timeout-0.3.0/lib/timeout.rb:179:in `block in timeout'
/opt/vagrant/embedded/gems/2.3.3/gems/timeout-0.3.0/lib/timeout.rb:36:in `block in catch'
/opt/vagrant/embedded/gems/2.3.3/gems/timeout-0.3.0/lib/timeout.rb:36:in `catch'
/opt/vagrant/embedded/gems/2.3.3/gems/timeout-0.3.0/lib/timeout.rb:36:in `catch'
/opt/vagrant/embedded/gems/2.3.3/gems/timeout-0.3.0/lib/timeout.rb:188:in `timeout'
/opt/vagrant/embedded/gems/2.3.3/gems/vagrant-2.3.3/plugins/communicators/winrm/communicator.rb:31:in `wait_for_ready'
/opt/vagrant/embedded/gems/2.3.3/gems/vagrant-2.3.3/lib/vagrant/action/builtin/wait_for_communicator.rb:16:in `block in call'
/opt/vagrant/embedded/gems/2.3.3/gems/logging-2.3.1/lib/logging/diagnostic_context.rb:474:in `block in create_with_logging_context'
 INFO interface: error: An error occurred executing a remote WinRM command.
This was not very helpful. I found a GitHub issue with a similar problem, but no solution. Then I found this blog post which hinted to a problem with an OpenSSL update.
However, I had no problem to connect to WinRM via curl manually.
Finally I found the solution here.
The problem was NTLM still uses MD4 hashes, and those are disabled in newer OpenSSL releases.
I had to edit the OpenSSL config file to re-enable MD4 (Oh man, how I love good error handling with descriptive messages..).
[provider_sect]
default = default_sect
legacy = legacy_sect

[default_sect]
activate = 1

[legacy_sect]
activate = 1
After that, even the ruby WinRM example worked flawlessly.
8. Apple Silicon
- ✅ libvirt works on M1
- ✅ Vagrant 2.3.3 can be installed on M1
- However, it ships it's own embedded version of ruby, instead of using the one provided by the system. 🤮
- And, that shipped version is x86_64 always.
- And, that version (2.7.0) is from December 2019.
- And, Ruby offers a newer 2.x release: 2.7.7, from November 2022.
- And, support for 2.7.x ends in three months: 2023-03-31.
- And, of course, there is the fully supported Ruby 3.x, which is out for almost two years now.
- 🚧 However, the vagrant-libvirt plugin can not be installed ootb.
$ vagrant plugin install vagrant-libvirt
// ruby-libvirt-0.8.0.gem
"gcc -o conftest -I/opt/vagrant/embedded/include/ruby-2.7.0/x86_64-darwin19 -I/opt/vagrant/embedded/include/ruby-2.7.0/ruby/backward -I/opt/vagrant/embedded/include/ruby-2.7.0 -I. -I/opt/homebrew/Cellar/libvirt/8.9.0/include -I/opt/vagrant/embedded/include -mmacosx-version-min=10.9 -isysroot /Library/Developer/CommandLineTools/SDKs/MacOSX.sdk -I/opt/vagrant/embedded/include -D_XOPEN_SOURCE -D_DARWIN_C_SOURCE -D_DARWIN_UNLIMITED_SELECT -D_REENTRANT   -I/opt/vagrant/embedded/include -mmacosx-version-min=10.9 -isysroot /Library/Developer/CommandLineTools/SDKs/MacOSX.sdk -I./include -O3 -std=c99 -fno-common -pipe  conftest.c  -L. -L/opt/vagrant/embedded/lib -L/opt/vagrant/embedded/lib -L.  -mmacosx-version-min=10.9 -isysroot /Library/Developer/CommandLineTools/SDKs/MacOSX.sdk -fstack-protector-strong -L/opt/vagrant/embedded/lib -L/opt/homebrew/Cellar/libvirt/8.9.0/lib     -lvirt -lruby.2.7 -lvirt  -lvirt  "
conftest.c:16:13: error: conflicting types for 'virConnectOpen'
extern void virConnectOpen();
            ^
/opt/homebrew/Cellar/libvirt/8.9.0/include/libvirt/libvirt-host.h:737:25: note: previous declaration is here
virConnectPtr           virConnectOpen          (const char *name);
                        ^
conftest.c:17:30: error: too few arguments to function call, single argument 'name' was not specified
int t(void) { virConnectOpen(); return 0; }
              ~~~~~~~~~~~~~~ ^
/opt/homebrew/Cellar/libvirt/8.9.0/include/libvirt/libvirt-host.h:737:25: note: 'virConnectOpen' declared here
virConnectPtr           virConnectOpen          (const char *name);
                        ^
2 errors generated.
There is an open issue on GitHub for exactly this plugin.
However, it is open since Februar 2021 already. Two fixes are already merged in fog-libvirt and libvirt-ruby.
But both projects did not have a release for over a year now, and one of them is even an offical libvirt project. This makes me think..
So I guess for Apple Silicon I still have to wait some time until Vagrant is fully supported.
9. libvirt vs. VirtualBox
Short summary: libvirt in general looks promising as an alternative to VirtualBox and I will experiment more with it in the next months.
- 👍 Runs all boxes on all system architectures
- 👍 Free software (unlike VirtualBox' extension pack: Free for Personal Use only)
- 👍 Both work with Vagrant
- 👎 Steeper learning curve
- 👎 No similar concept (like .ova) to export a whole box
- 👎 Not much activity in an offical repo libvirt-ruby